Everything About Dependency Injection
Spring IoC (Inversion of Control) concept
IoC is a principle where each object stores its own dependencies. Dependencies that declared by spring (such as @Bean, or @Component) or so on is saved into Spring Context
Spring common annotation
@Configuration
This is where you declare your @Bean. @Configuration is the source where you declare your @Bean configuration.
For example
@Configuration
public class AppConfig {

	@Bean
	public BeanOne beanOne(BeanTwo beanTwo) {
		return new BeanOne(beanTwo);
	}

	@Bean
	public BeanTwo beanTwo() {
		return new BeanTwo();
	}
}
So now when we want to use beanOne, we can call in our application
@Component
public class SomeClass {
	private final BeanOne beanOne;

	@Autowired // ommitable
	public SomeClass(BeanOne beanOne) {
	}
}
[!important]
To use@Autowiredfeature, the class needs to be a spring bean, so either create with@Beanor annotate the class as@Component,@Service, …
Also see: Full @Configuration vs Lite Bean
@EnableAutoConfiguration
@EnableAutoConfiguration is used to automatically configure dependency beans on the classpath dependencies and other properties. It scans the classpath for configurations and automatically configure it
So for example if we have like a Hibernate JAR, it will automatically configure hibernate for you.
Auto-configuration classes are normally beans that declared in @Configuration of other packages.
@ComponentScan
When we declare @Bean or @Component or @Service or so on, we need to declare a way for SpringBoot to know where to search for these classes.
A class annotated with @ComponentScan without arguments tell Spring to scan the current package of the class hierarchy. For example given the following structure:
├── config
│   ├── ApplicationConfig.java
│   └── DataSourceConfig.java
├── api
│   ├── request
│   │   └── CustomerRequestPayload.java
│   └── response
│       └── ApiResponsePayload.java
├── App.java
├── cache
│   ├── CacheAspect.java
│   ├── EnableCache.java
│   └── RedisConfig.java
├── config
│   ├── ApplicationConfig.java
│   └── DataSourceConfig.java
├── controller
│   └── ApiController.java
├── dao
│   └── Customer.java
├── repositories
│   └── CustomerRepository.java
└── services
    ├── AccountService.java
    └── CustomerService.java>)
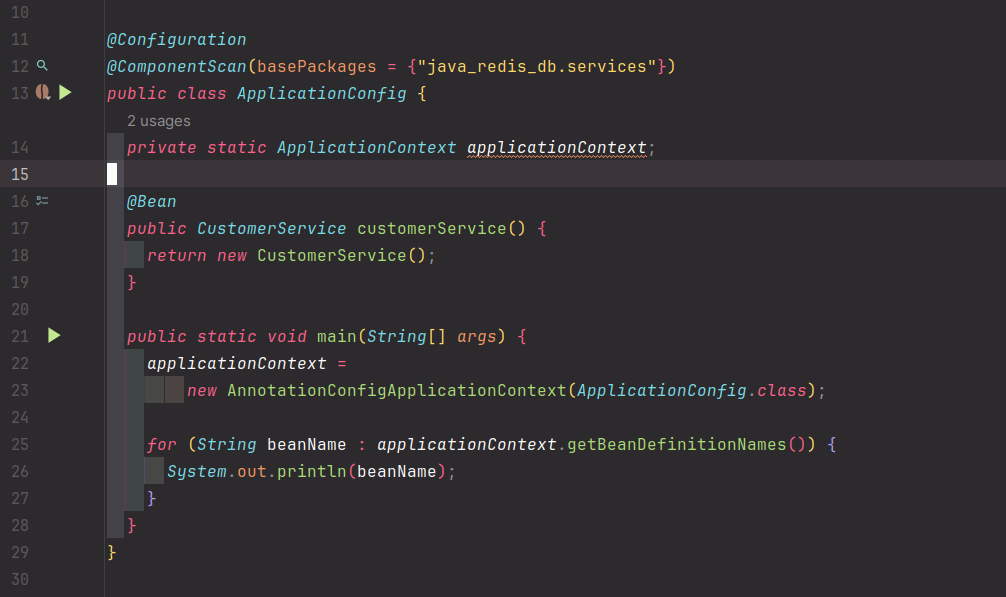
Where we put @ComponentScan in ApplicationConfig.java which is in the package java_redis_db.config. As a result, ApplicationConfig.java will have access to all the beans in ApplicationConfig.java and DataSourceConfig.java if we runs as a main function there:

... // spring internal stuff
applicationConfig
dataSourceConfig
getDataSource
customerService
Base package
We can change the base packages to get a different result, for example
Which will give us
applicationConfig
accountService
customerService
Note that now we don't have dataSourceConfig and its beans anymore
[!important]
This only happens when we runs themain()function from ApplicationConfig.java itself. Normally if you runs it from the mainApp.javawhich is annotated with@SpringBootApplicationit will pick up the@ComponentScanthere since that's the entry of the application
@SpringBootApplication
We normally put this in our app entry point, in this case is App.java
A combination of
@ComponentScan: Scan all the package from theApp.java— so basically all the@Beanwill be registered@EnableAutoConfiguration: Configure all the third party dependency we're using@Configuration: So that in the App.java itself we can create our@Bean
Spring Stereotype Annotation
Includes @Component, @Repository, @Controller. These are Spring's stereotype annotations which basically is a Bean.
However we don't need to do @Bean and have to call the function ourself. By putting one of these annotation in the class level, Spring will auto handle the bean creation for us.
[!note]
The@Beanworks on function level where you put it on the function but for stereotype annotation you need to put it on class level.
@Component
This is the most basic thing. It's basically the same thing as @Bean with not much other functionality
@Service
Same thing as @Component but with different naming just for clarity.
@Repository
This provide another functionality on top of @Component and @Repository that throws Unchecked exception as DataAccessException
@Controller
Provide the functionality to create RestController or Spring Web MVC controller.
Two Bean of the same name
When there are 2 beans of the same name, Spring must pick one, the process goes as following:
- Spring looks for the bean of type
CustomerService. - If there are 2 beans for the same type, Spring will check if there is a
@Qualifierdeclare to pick which Bean - If there is no
@Qualifier, spring will look for the matching bean name
Bean name
Bean name by default is defined by method name. For example we have the following AccountService
package java_redis_db.services;

import lombok.RequiredArgsConstructor;

@RequiredArgsConstructor
public class AccountService {
  public final String serviceName;
}
We have our ApplicationConfig that provides the Beans for AccountService
package java_redis_db.config;

import java_redis_db.services.AccountService;
import org.springframework.context.ApplicationContext;
import org.springframework.context.annotation.Bean;
import org.springframework.context.annotation.Configuration;

@Configuration
public class ApplicationConfig {
  private static ApplicationContext applicationContext;

  @Bean
  public AccountService customerAccountService() {
    return new AccountService("Customer Account Service");
  }

  @Bean
  public AccountService businessAccountService() {
    return new AccountService("Business Account Service");
  }
}
Now we have the following CustomerService that uses AccountService as a dependency:
package java_redis_db.services;


import org.springframework.beans.factory.annotation.Autowired;
import org.springframework.stereotype.Service;


@Service
public class CustomerService {
  public AccountService accountService;

  @Autowired
  public CustomerService(AccountService accountService) {
    this.accountService = accountService;
  }
}
This will throw an error because it doesn't know which AccountService we should inject for CustomerService.
Using variable name
One solution is we can specify our parameter name to be customerAccountService instead of accountService.
For example:
package java_redis_db.services;


import org.springframework.beans.factory.annotation.Autowired;
import org.springframework.stereotype.Service;


@Service
public class CustomerService {
  public AccountService accountService;

  @Autowired
  public CustomerService(AccountService customerAccountService) {
    this.accountService = customerAccountService;
  }
}
[!note]
This works because by default spring initialise Bean name as the method name. So in this example we have two beans:customerAccountServiceandbusinessAccountService. We can use variable namecustomerAccountServiceto specify that we want this particular beans.
Use @Qualifier
Another way is we can use @Qualifier to specify which beans we wanna take. In the example above, the code can be fixed as following:
package java_redis_db.services;


import org.springframework.beans.factory.annotation.Autowired;
import org.springframework.beans.factory.annotation.Qualifier;
import org.springframework.stereotype.Service;


@Service
public class CustomerService {
  public AccountService accountService;

  @Autowired
  public CustomerService(@Qualifier("customerAccountService") AccountService accountService) {
    this.accountService = accountService;
  }
}
This is somewhat better since we have the flexibility of using our own variable name.
We can also declare a name for our Bean for example:
@Bean(name = "customer account service")
public AccountService customerAccountService() {
  return new AccountService("Customer Account Service");
}
And then we can use it as
@Autowired
public CustomerService(@Qualifier("customer account service") AccountService accountService) {
  this.accountService = accountService;
}
Bean scope
We have the following scope
singleton: default scope, one single instance for all variablesprototype: new instance each time it's referencedsession: one instance per user session (Web environment only)request: one instance per request (Web environment only)
To declare an instance, we can use @Scope
@Bean(name = "customer account service")
@Scope("prototype")
public AccountService customerAccountService() {
  return new AccountService("Customer Account Service");
}